
Use case
There are plenty of situations where you need to import data from an attachment into a ServiceNow table without relaxing ACLs.
A common example is importing users manually because:
- No AD or other integration is in place to auto-import users.
- External users need to be imported that can’t be synchronized via AD integration.
- You want to let users import new users without giving them elevated privileges or native platform access.
- Any number of other one-off reasons.
What are we building?
Glimpse of the output:
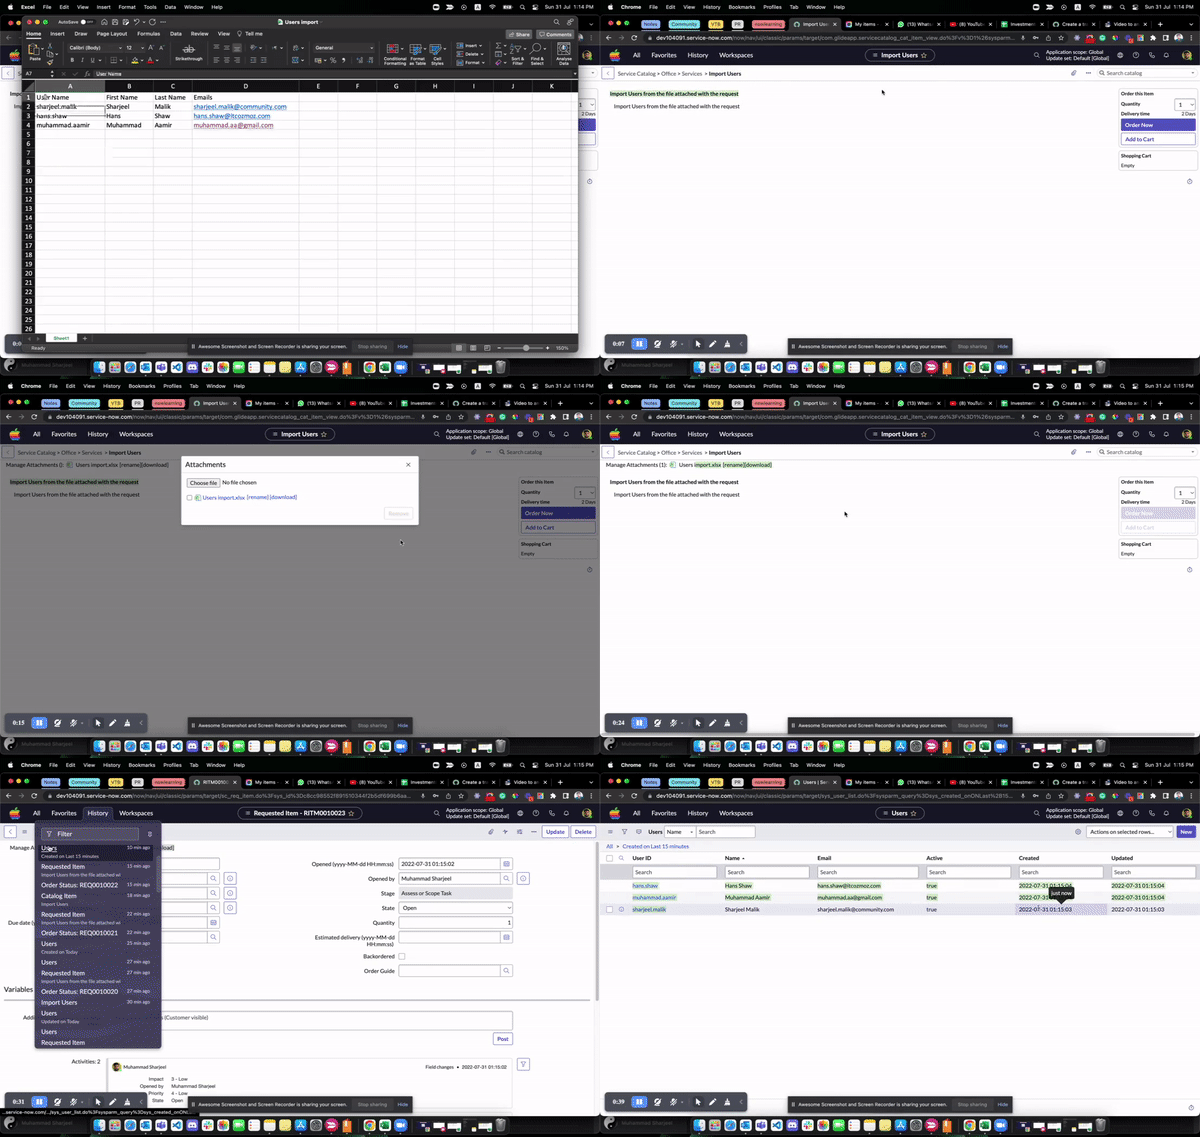
Let’s build
Let’s get your hands dirty with guided steps.
Step 1: Create a catalog item by navigating to Service Catalog > Catalog Definition > Maintain Items.
Reference: Create a Catalog item | ServiceNow Docs
For this demo, I created a basic catalog item without any variables, since I’m only importing users from the attached file.
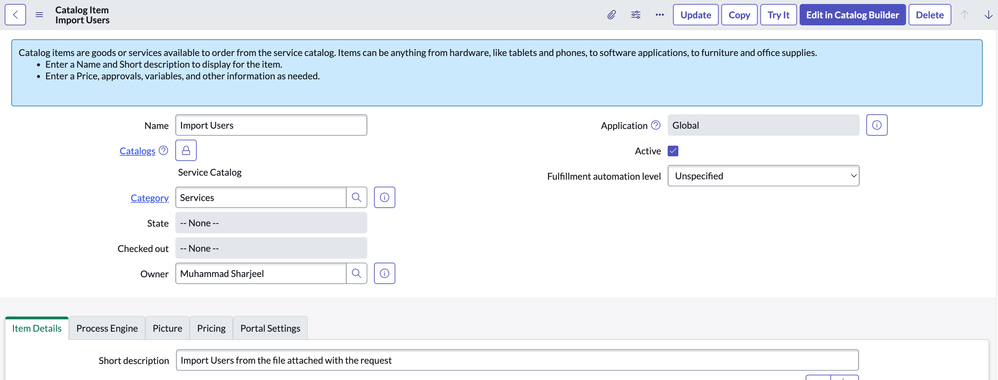
Step 2: Next, create a Data Source to parse the file attachment and import users. Navigate to System Import Sets > Administration > Data Sources.
The data source configuration is shown below.
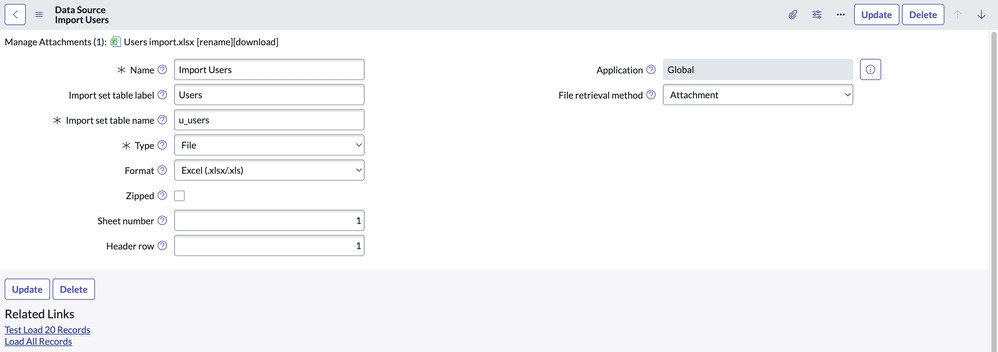
Reference: Create a data source | ServiceNow Docs
Step 3: Attach the sample users Excel file. Click the paperclip icon in the top grey header and upload the file, then click Related Links > Test Load 20 Records.
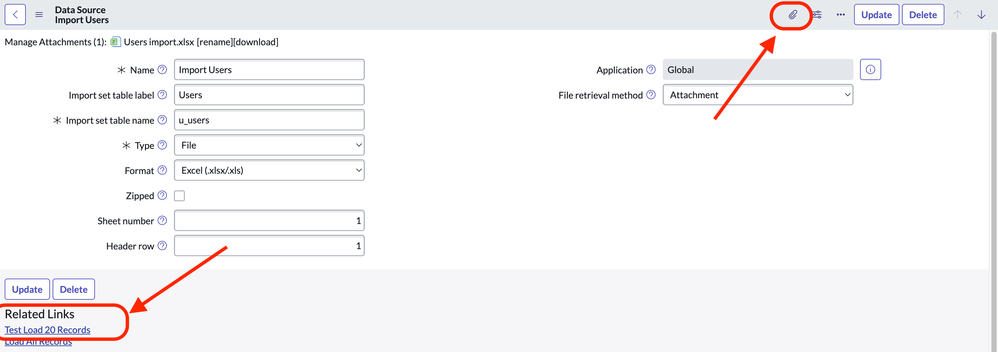
Note: this step is important — it auto-creates the import set table and imports sample data with columns from the attachment.
Step 4: On the next screen, click Create Transform Map.
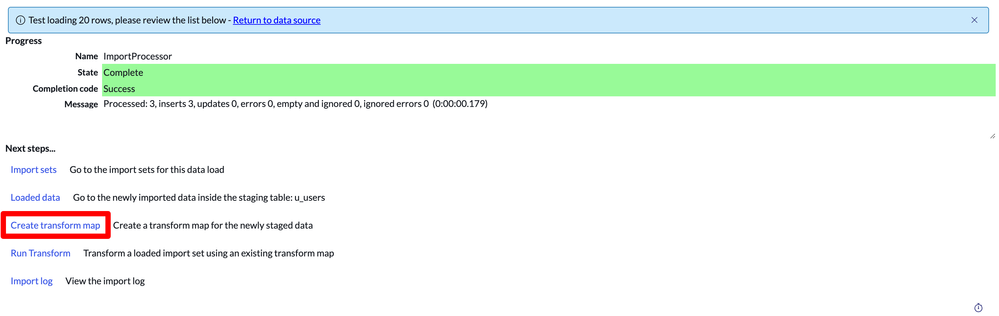
Reference: Create a Transform map | ServiceNow Docs
Step 5: Fill out the form as shown, then click Related Links > Auto Map Matching Fields.
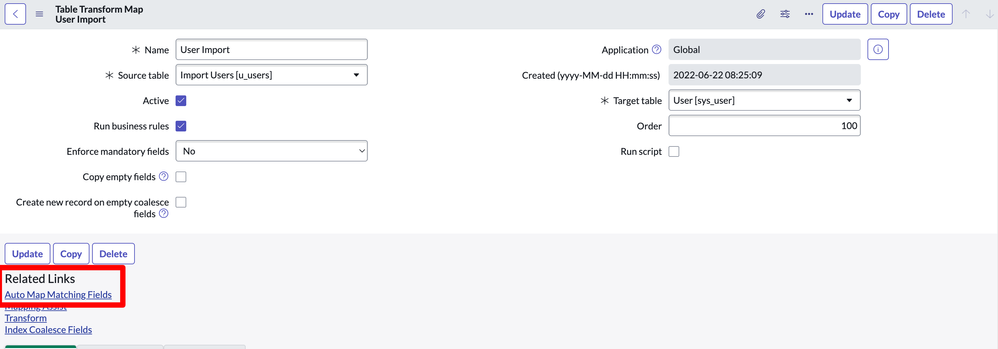
Note: “Auto Map Matching Fields” creates the field mapping between the import set table and the target user table. If any field mapping is missing, use Mapping Assist to map it manually.
Once that’s done, you should see field maps created against all the columns coming from the Excel sheet.
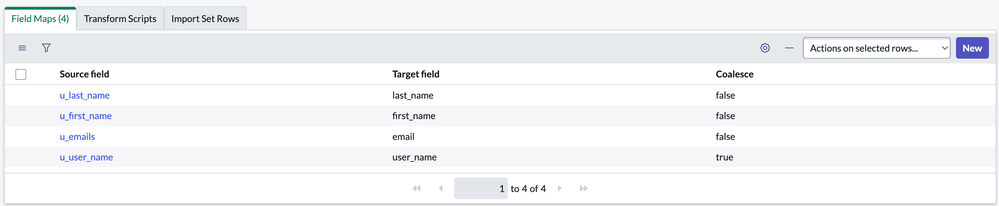
Note: my attachment only has 4 populated columns, so 4 field maps were created — yours may differ.
Step 6: Navigate to System Import Sets > Administration > Scheduled Import Sets.
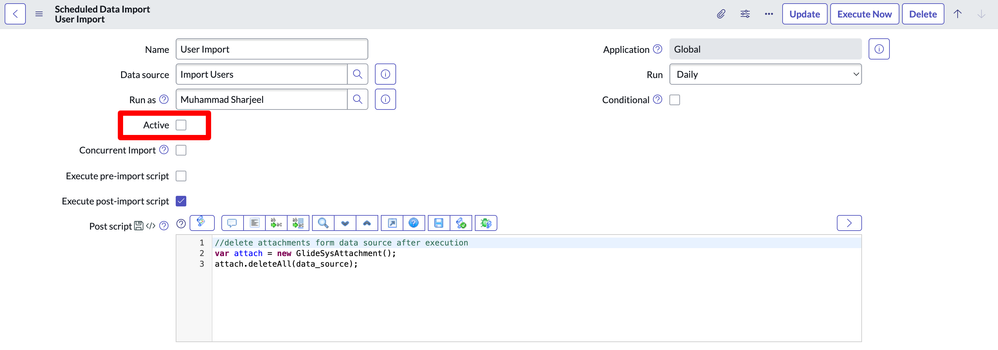
Script
//delete attachments from data source after execution
var attach = new GlideSysAttachment();
attach.deleteAll(data_source);
Note: the Active checkbox must be unchecked, since we’re importing attachment data on request submission rather than on a schedule. Copy the sys_id of the scheduled data import — we’ll need it in the last step.
Step 7: The last step is creating a Business Rule that copies the attachment from the requested item to the data source, so the data source can process it and create users.
Business rule configuration is shown below.
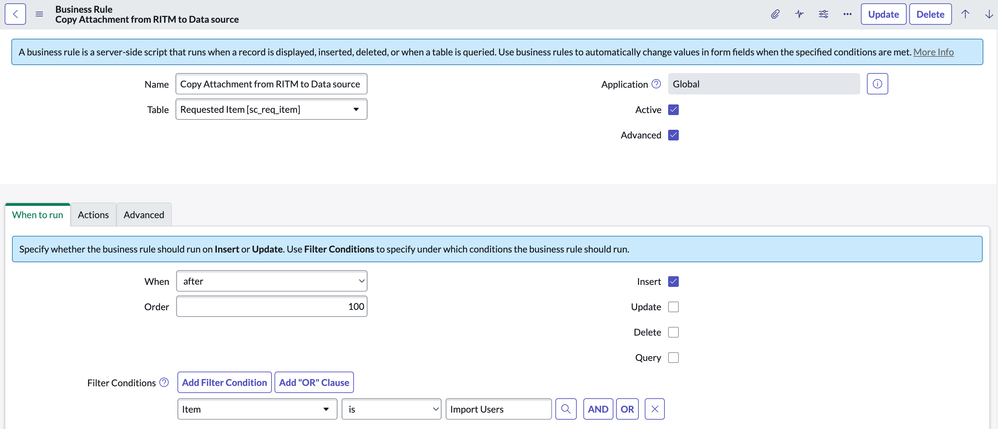
Under the Advanced tab, paste the following into the script editor:
(function executeRule(current, previous /*null when async*/) {

    // Add your code here
    var attachment = new GlideSysAttachment();
    var attached = attachment.copy('sc_req_item', current.getUniqueValue(), 'sys_data_source', 'b3e781382f5c9110344f2b5df699b6a9');

    if(attached){
        gs.info('Attachment Copied from: ' + current.number);
        var grImp = new GlideRecord("scheduled_import_set");
        if(grImp.get('25b941b82f5c9110344f2b5df699b6d4')){ // Replace "25b941b82f5c9110344f2b5df699b6d4" with sys_id of Scheduled import
            gs.executeNow(grImp);
        }
    }

})(current, previous);
Note: replace 25b941b82f5c9110344f2b5df699b6d4 with the sys_id of the scheduled import copied in step 6.
And that’s it — submitting the catalog item with an attached Excel file now imports the users automatically.